**More progress to report on this sculpture. Every time I think the next piece is going to be easier than the previous one, I prove myself wrong. This one is a challenge indeed but I am getting some good practice with sculpting a small scale face. I hope to start working on the hair and wings next.
****************
This is another one of the watercolor fairies that I am trying to recreate in a 3D format. The first one I did was the 'Trumpet Flower Fairy' and this is the second in the series called the 'Japanese Iris Fairy'.
This time, I am trying to plan better the wire structure of the fairy. I find myself always improvising as I do the sculpture. I think it is a good idea to plan it first so I can refine the process and make more robust wireframes. With that in mind, I started doing some drawings showing how I envisioned the wireframe and all the supporting and removable structures on this sculpture would look.
One area where I always seem to have issues is the wings. This time, I want to plan this process better. The wings in this case are removable because that will allow me to sculpt the back of the fairy and also the wings better.
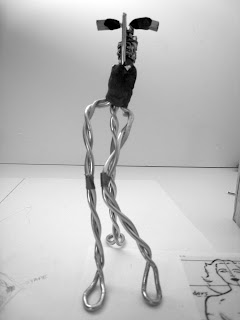
Above, I started with a piece of wire and did the right side of the figure. I then start twisting the wire with the drill as shown below. I do the same with the other side of the figure. I mark with tape the knee joints so I know where to bend when I need to.
Below is the unfinished wireframe. Next to it is a rough of the wire bent to take the shape of the fairy siting on the rock. In the back, two small pieces of tubing were used to hold the wings as planned.
Below shows another 2 pieces of tubing used around the shoulders which will be holding the removable arms. Certain areas of the sculpture are further reinforced with plumbers epoxy putty.
This is how far I've gotten with this piece. I will post again as I progress.


